Author Topic: My benchrest stock making  (Read 44115 times)

Offline bobfortier

  • Jr. Member
  • **
  • Posts: 19
    • View Profile
My benchrest stock making
« on: August 01, 2012, 06:47:49 PM »
Hi all

I'm fairly new to the game, so I have to start with what I already have. I want to shoot in a couple of events next year in the Heavy Varmint class. So here is what I have to start with. Please don't laugh, we all have to start somewhere.

Savage Axis 223 action
Savage 12VLP barrel 1-7 twist
Rifle Basix trigger
Vortex crossfire 8-32x50 scope

Ok, I know all of this is way out of what you shoot. I want to shoot benchrest a bit like you play golf, trying to improve from your last shot all the time.

My current stock was made by myself to do a kinda do-it-all rifle. I will keep it in the safe if I go to shoot an f-class prone type event. It could have been ok for benchrest, but when I did it I made a belly shape to help keep the bipod in place, and it does not ride the bag that well.


And here is the action out of the stock. The low-price Axis has a recoil key as opposed to a recoil lug. It fits in a 3/16 groove in the stock.


I offer after-market laminated stocks for Savage Axis. What I do is I inlet a couple of blocks in advance, when I get an order I finish the shape and I apply the finish. I had a couple of blocks ready, and among them one that the mag was not fitting properly. Since I will bed the thing and shoot it single shot, no problem in taking this one that was taking space anyway.


Offline bobfortier

  • Jr. Member
  • **
  • Posts: 19
    • View Profile
Re: My benchrest stock making
« Reply #1 on: August 01, 2012, 06:55:39 PM »
So, now I need to give it a shape. Here is a pic I found of the style I want to give it, and the same with a couple of measurement I deduced.


But first, lets have a look in the rule book. It says that 18 inches from the boreface, to 4 inches lower that the bore line, the buttstock must not be straighter than the line (sorry for my english, you get the idea...)


I did the cut a bit more angled, just to make sure.

Next I needed to make it longer. I use baltic birch plywood, 4 board of 1/2 inch glued together. It comes in 60 x 60 sheet, so my Axis blank are 29 3/4 in lenght. Since my stock will be painted (some blue I think) I don't really care about glue lines, the y will be sanded smooth later.

So I took the piece I just cut and prepared it to extend the stock


Offline bobfortier

  • Jr. Member
  • **
  • Posts: 19
    • View Profile
Re: My benchrest stock making
« Reply #2 on: August 01, 2012, 06:59:10 PM »
And all I had to do was glue 2 1/2 inch strips on each side to make it a bit under 3"


I also made a small piece to delete the mag opening, it will all be sanded smooth later


Now it is all glued up, next step is refining the inletting, pillar bedding, and then shape the exterior

Hope you like it so far.

Offline bobfortier

  • Jr. Member
  • **
  • Posts: 19
    • View Profile
Re: My benchrest stock making
« Reply #3 on: August 11, 2012, 05:56:53 AM »
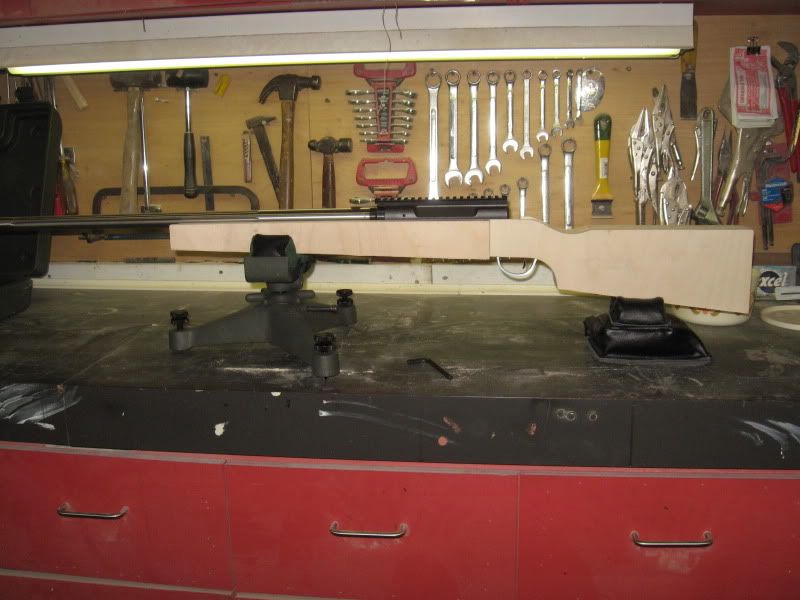
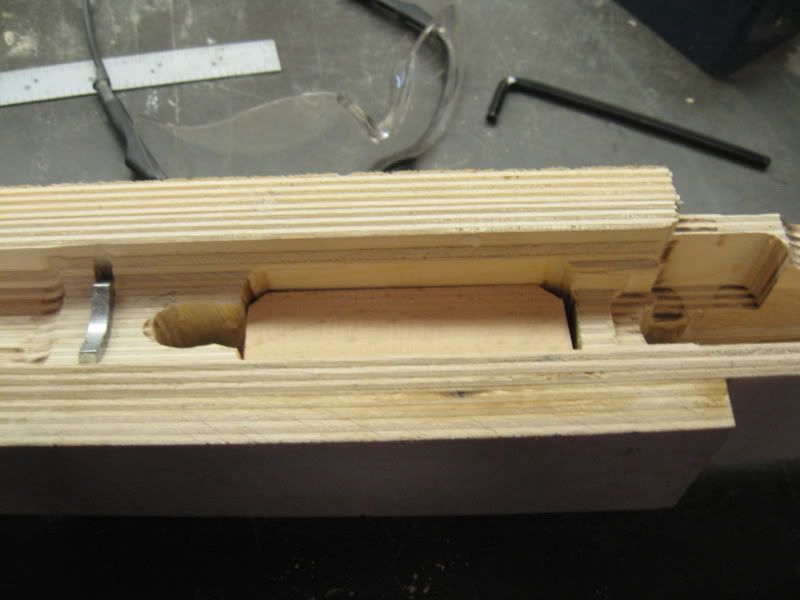
Next step is the pillar bedding. Here is the action in the stock, just to get the idea.


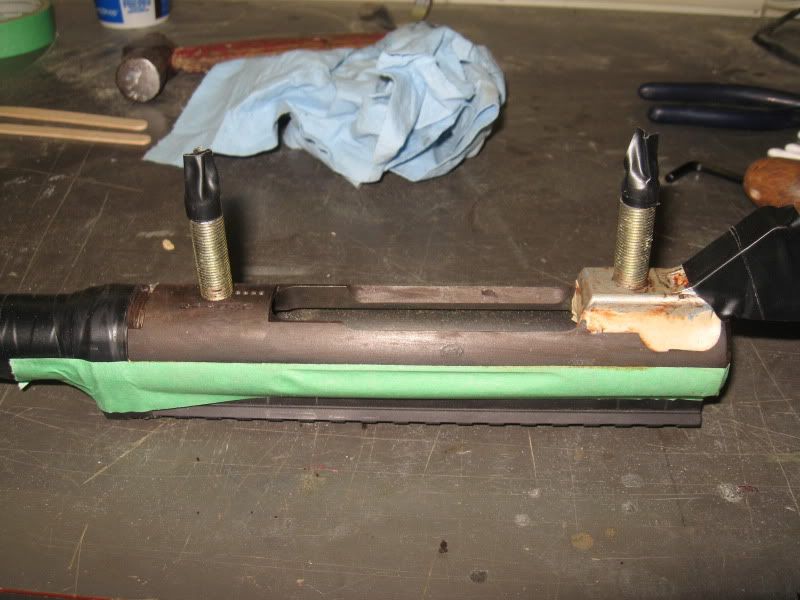
Next is the preparation for the bedding. I use the method found on the net that is called a "stress-free pillar bedding". The idea is to glue up the pillar in Devcon. So I made the screw hole bigger, and prepared the pillar.

First, cut the screw to lenght. I insert a thread die, cut the bolt with the cutting wheel, and I remove the die, cleaning the threads.
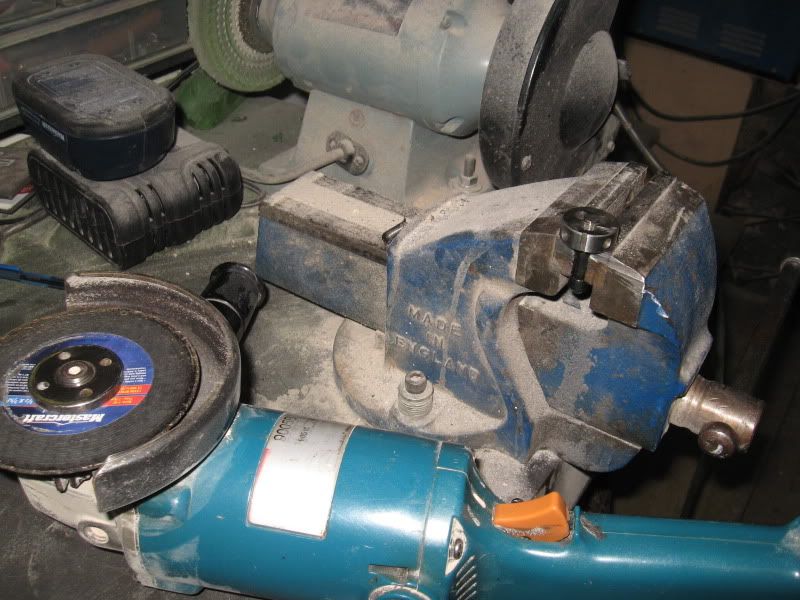


Then I prepared the pillar. I use tubes found in the electrical section of hardware stores. They can be cut to lenght, have a perfect internal diameter, and the outside is threaded so the Devcon grip properly. I put a couple of layer of electrical tape on the screws so they are centered in the pillar. When I remove the tape later the screws will not touch inside the pillar.
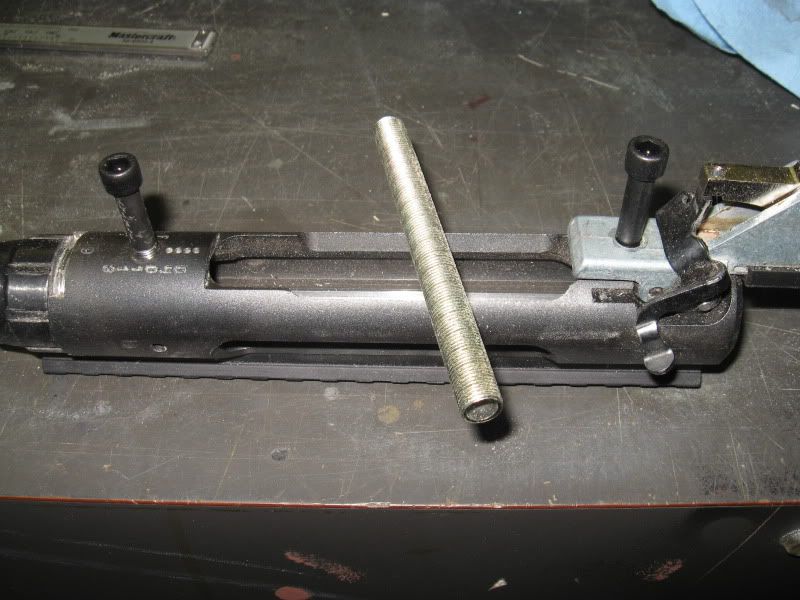
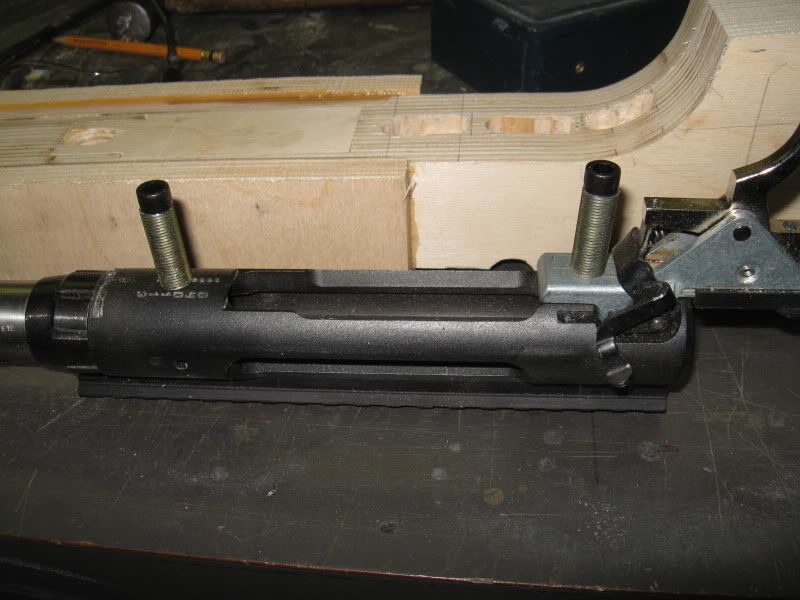


After that, preparing the action with the usual shoe-polish and plumber stuff to avoid mechanical lock
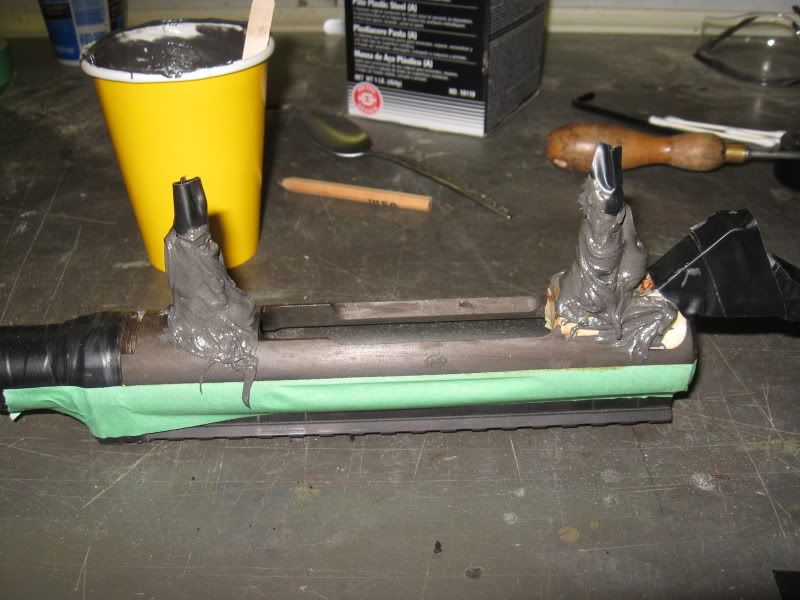
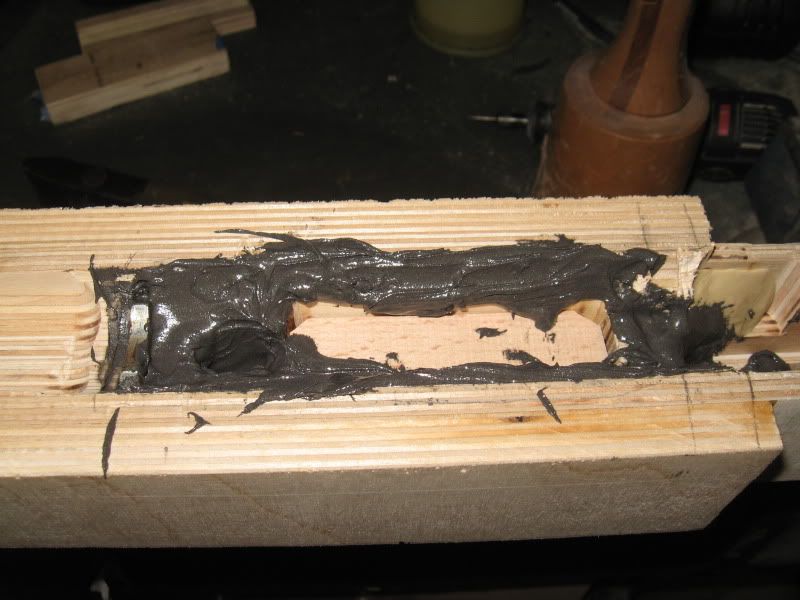


Here is a trick. I clamp the stock in the vice and I make sure it is level. When I lower the action into the stock for the bedding, I put the level on the scope rail, and it tells me if I am level or not.
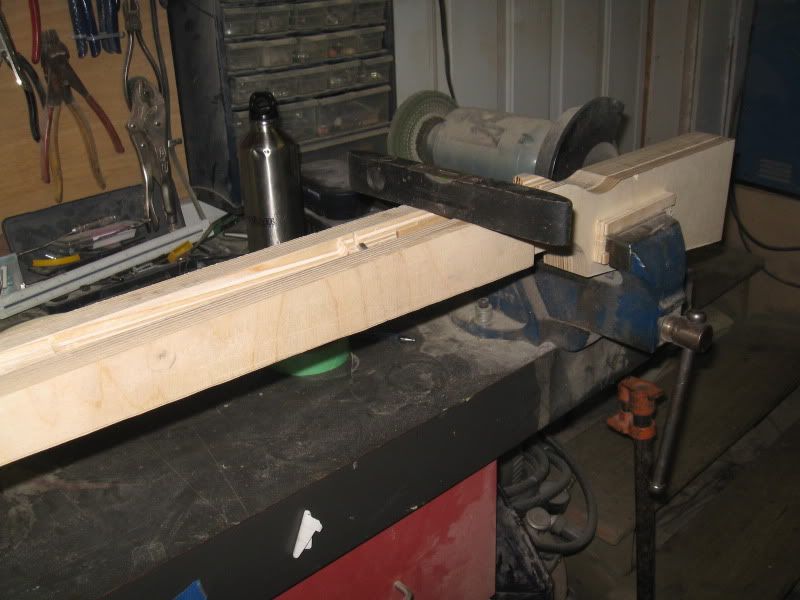
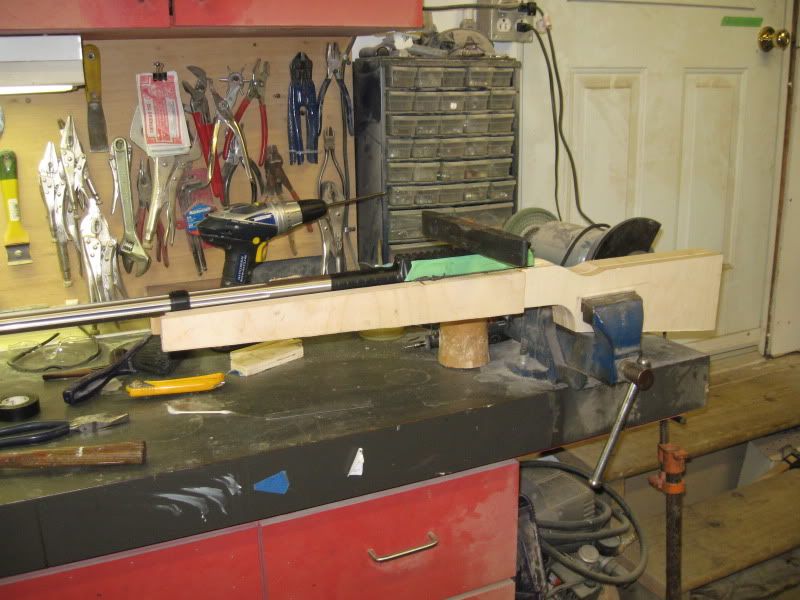


And this morning (the bedding was done yesterday evening) I removed the 2 screws, and the action popped right out, revealing a very good bedding job IMHO. It needs a bit of cleaning, but it will be good.
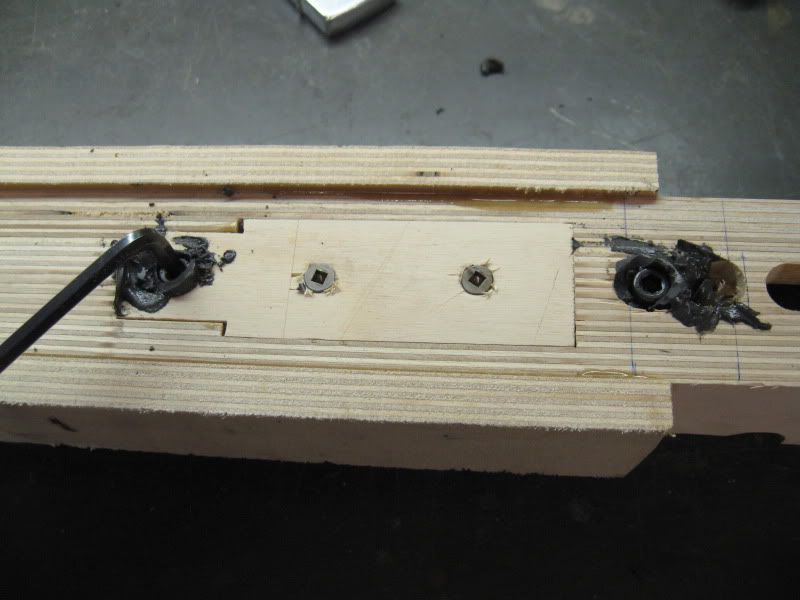
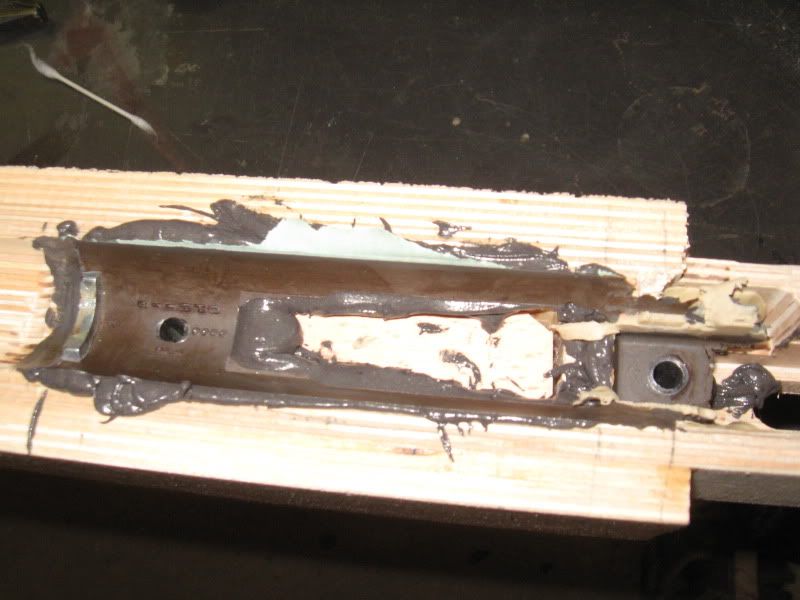
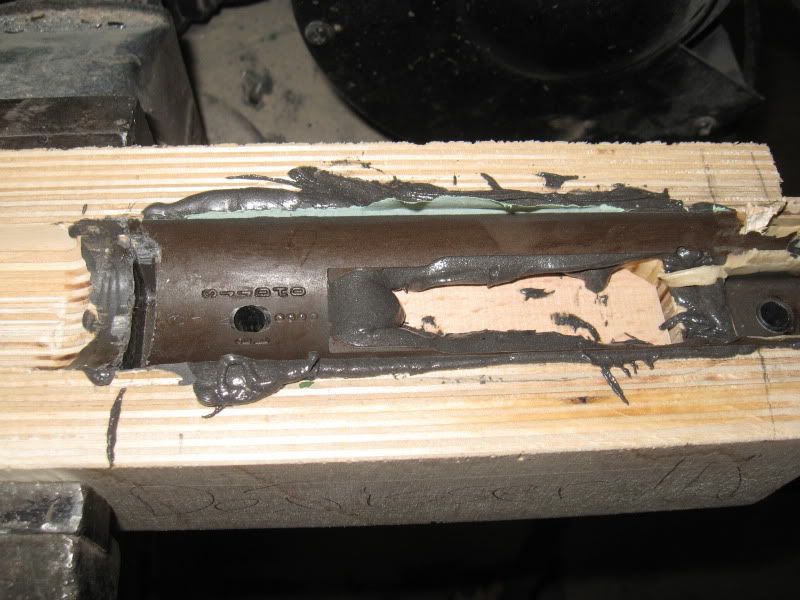


To be continued. I am currently in a home-reno project, so it might take a couple of days before I touch it again. The Devcon will have time to dry properly.

Offline RayS

  • Full Member
  • ***
  • Posts: 36
    • View Profile
Re: My benchrest stock making
« Reply #4 on: August 11, 2012, 09:36:55 AM »
Bob:
Do you have any problems removing the excess devcon? 
Ray

Offline bobfortier

  • Jr. Member
  • **
  • Posts: 19
    • View Profile
Re: My benchrest stock making
« Reply #5 on: August 11, 2012, 10:48:12 AM »
I try to remove it as soon as I remove the action from it. It is still "fresh" and easily removed. Then I wait a couple of days before I re-assemble the action.

Offline bobfortier

  • Jr. Member
  • **
  • Posts: 19
    • View Profile
Re: My benchrest stock making
« Reply #6 on: August 15, 2012, 07:25:21 AM »
Started the shape yesterday.


Buttpad is 1/4 aluminium


Getting there


Offline cyanchycki

  • Hero Member
  • *****
  • Posts: 854
    • View Profile
    • Selkirk Game and Fish
Re: My benchrest stock making
« Reply #7 on: August 15, 2012, 09:25:11 AM »
Looking good so far Bob.
My house is protected by the good Lord and a GUN............
When I Die I don't wanna go Sober..................................

Offline bobfortier

  • Jr. Member
  • **
  • Posts: 19
    • View Profile
Re: My benchrest stock making
« Reply #8 on: August 17, 2012, 02:09:42 PM »
Thanks for the comment

I bought a can of metalic blue in the automotive section at Canadian Tire, and it turned out that it was not a metalic finish, so I decided to get some Krylon blue, turned out pretty nice IMHO. And I had extra, so I did my front rest the same, why not !


Next step is to re-assembled the action into the stock, make the single shot plate, and go shoot !
« Last Edit: August 17, 2012, 02:10:18 PM by bobfortier »

Offline Fergus

  • Jr. Member
  • **
  • Posts: 17
    • View Profile
Re: My benchrest stock making
« Reply #9 on: August 17, 2012, 04:22:13 PM »
Started the shape yesterday

Hi Bob

What tools do you use for shaping?

Offline bobfortier

  • Jr. Member
  • **
  • Posts: 19
    • View Profile
Re: My benchrest stock making
« Reply #10 on: August 17, 2012, 04:50:17 PM »
I use the grinder that is on the picture beside the stock. Grit 50 sandpaper, dust collector, and I finish with an orbital sander

Offline bobfortier

  • Jr. Member
  • **
  • Posts: 19
    • View Profile
Re: My benchrest stock making
« Reply #11 on: August 18, 2012, 05:52:17 PM »
Done !

Next step is learn how to shoot free-recoil. I adjusted the trigger as low as I could, more than that and it shoots when I close the bolt.


Offline RayS

  • Full Member
  • ***
  • Posts: 36
    • View Profile
Re: My benchrest stock making
« Reply #12 on: August 18, 2012, 06:14:32 PM »
Looks great Bob.  The build process and pictures sure are helpful.  Now all I have to do is find an action.  My stock is rough cut but following your advice I will inlet it and bed the action before proceeding.
Ray

Offline Fergus

  • Jr. Member
  • **
  • Posts: 17
    • View Profile
Re: My benchrest stock making
« Reply #13 on: August 20, 2012, 02:15:40 PM »
I use the grinder that is on the picture beside the stock. Grit 50 sandpaper, dust collector, and I finish with an orbital sander

Thanks for the information. That looks like good work for "free handing" the dimensions.

Do you think the same tools would work for balsa laminate? I want to make a carbon fiber stock along the lines of a Scoville, but need to make up the core to be wrapped. I am not too sure how best to shape the balsa core. I guess I will just need to make one up and give it a try.

Offline Fergus

  • Jr. Member
  • **
  • Posts: 17
    • View Profile
Re: My benchrest stock making
« Reply #14 on: August 20, 2012, 02:26:17 PM »
Done !

Next step is learn how to shoot free-recoil. I adjusted the trigger as low as I could, more than that and it shoots when I close the bolt.


Hi Bob

These are just some observations based on what I see in the photos. You may know this already, so take this as general comments that you use or ignore as you feel appropriate.

I notice the rest is a long way back on the forend, although that may be just the table you have it sitting on being too short. Ideally you want to set the forend on the front bag with about 1" over the bag, although the rifle will tell you where it shoots best. A light trigger is a key part of free recoil, so you will need to be very careful with you technique in letting the shot go. I know you have limited funds, but ideally you want a firmer, heavier rear bag. You will really need to watch that rear bag pictured to make sure you do not bump the gun off line with your shoulder, or when you open the bolt. You may find it easier to find the stock with your shoulder if you have an inch or so of the but sitting back past the bags.

Offline bobfortier

  • Jr. Member
  • **
  • Posts: 19
    • View Profile
Re: My benchrest stock making
« Reply #15 on: August 20, 2012, 03:39:04 PM »
Thanks for the advice about the bag, I will keep all of this in mind. The pics were taken on my tablesaw, I will have a better idea when I go to the range.

About the balsa, it will work, but I think a 50 grit will be a bit to violent for balsa

Offline Blairguy

  • Full Member
  • ***
  • Posts: 57
    • View Profile
Re: My benchrest stock making
« Reply #16 on: December 14, 2012, 02:34:44 PM »
I use the grinder that is on the picture beside the stock. Grit 50 sandpaper, dust collector, and I finish with an orbital sander

Thanks for the information. That looks like good work for "free handing" the dimensions.

Do you think the same tools would work for balsa laminate? I want to make a carbon fiber stock along the lines of a Scoville, but need to make up the core to be wrapped. I am not too sure how best to shape the balsa core. I guess I will just need to make one up and give it a try.


Fergus, Have you considered trying a Surfoam rasp style tool to do the rough shaping of the balsa?

Offline Fergus

  • Jr. Member
  • **
  • Posts: 17
    • View Profile
Re: My benchrest stock making
« Reply #17 on: December 29, 2012, 01:07:47 PM »

Fergus, Have you considered trying a Surfoam rasp style tool to do the rough shaping of the balsa?

Still thinking about the whole approach to building stocks right now. I have plenty of ideas, but haven't really had the time available to make a start. I think I need to just make a start experimenting, and be prepared to toss out a few early failures.

Part of the problem is that I want to make a scoville style stock, so need to get the correct core shape, and also get decent at laying up the carbon fibre. Probably too much thinking and procrastination on my part - I really should just invest some time and get going.

Offline bobfortier

  • Jr. Member
  • **
  • Posts: 19
    • View Profile
Re: My benchrest stock making
« Reply #18 on: December 29, 2012, 04:30:28 PM »
Quick update. My stock is now part of my rifle "system". Got my hand on another Axis, I installed a Savage 12 heavy barrel in 308 winchester (1:10 twist) and a EGW 20 moa base, same as on the 223 action. I pillar bedded the brown hunting stock.

So next time I go shoot I'll have the choice of stock, caliber, and scope. I think the 308 will be better suited to BR than the 223. I'll devellop loads next season for this caliber.


SMF spam blocked by CleanTalk